Lotus Flower Lace Scarf~ Free Crochet Vintage Pattern
Have you ever come across a lovely vintage crochet accessory that is so beautiful you frantically search for a free crochet vintage
pattern everywhere? While a few members of the Crochet Lounge fb group worked up their Queen Anne’s Lace Scarf, our dear friend, and artist, Amanda Watson posted her similarly lacy scarf.

Artist Amanda Watson - Self Portrait in Ball Point Pen
Out of all the requests, Amanda noted it came from a vintage publication, The Creative Wife vol 6 by Sea & Co. Publishings in 1915. Have you ever seen a pattern prior to crochet terms being standardized? While I haven’t seen the actual written pattern for this scarf, from the conversations with Amanda the original pattern stitches read as follows:
‘sc is “twisted rod”….dc is “double twisted rod”….. a chain is a “bead” in “strands of beads” or “crochet around the beaded rope”, hdc is a ”wrapped rod” to crochet 2 together you “marry the stitches” and a shell is a petal!’
Needless to say, without Amanda’s hand drawn chart, I may have avoided this pattern short of giving it all a good giggle - my version in vintage talk after seeing her chart…
“make a strand of 7 beads, marry the stitches. make a strand of 3 beads, crochet around the beaded rope with 13 double twisted rods. Make 4 beads, turn, double twisted rod in the next double twisted rod, *make 1 bead, double twisted rod in the next double twisted rod, repeat 12 times. Make 3 beads, turn, double twisted rod in the next bead, make 3 more beads, turn work to its side and make a petal with 6 double twisted rods into the side of the double twisted rod …. *gets dizzy*”
Without further ado, the ‘translated’ written pattern from Amanda’s chart is included below.
Materials:
- Any weight yarn (suggested dk, worsted weight, bulky makes the motifs pop)
- Hook to match yarn
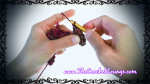
- The photos in this project is worked with Araucania Panguipulli #8 and a J/6.0mm hook
Stitches Used:
ch, slst, dc
Chain (ch) - yo (yarn over), pull through loop on hook
Slip Stitch (slst) - insert hook in indicated stitch, yo draw through stitch and loop on hook
Double Crochet (dc) - yo, insert hook in indicated stitch, yo draw up a loop, yo draw through 2 loops on hook, yo draw through remaining 2 loops on hook
Video Tutorial:
Right Handed
Lefty’s Corner ♥
Written Pattern:
Ch7, join with slst to form a ring
Motif #1:
Row 1: (crocheting over the tail)
Ch3, 13dcs into the ring
[Ch3, 13dcs]
Row 2:

Lotus Flower Lace Scarf Chart created by Amanda Watson
Ch4, turn, (dc, ch1) in next dc 12 times, dc in top of ch3 of row 1
[ch4, 13dcs, 12 ch1 spcs]
Row 3:
Ch3, turn, dc into the first ch1 spc
<Note: Turn the work 90 degrees clock-wise (90cw) - you will be working into the dc you just created>
<Lefty’s Note: Turn the work 90 degrees counter clock-wise (90ccw) - you will be working into the dc you just created>
*Ch3, 6dc into the dc bar you just created
<Note: This forms a petal, when done, back to crocheting into the previous row>
Skp a ch1 spc, slst into the next ch1 spc**
Repeat from * to ** 4 more times
<Note: You are crocheting into the odd numbered ch1 spaces created in the previous row e.g. #1 ch1 spc, #3, #5, #7, etc. skipping over the ones in between>
Ch7, slst to the top of ch3 of row 2
<Note: the Ch7 is the start of the semi circle/ring for the next motif>
[5 Ch3, 5dc, 5petals of (ch3, 6dc), ch7, slst]
Motif #2
Row 4:
Ch3, turn, 13dcs in ch7 space, slst to the top of ch3 of the last petal formed in the previous motif
[Ch3, 13dcs, slst]
Row 5:
Ch4, turn, (dc, ch1) in the next dc 12 times, dc in the top of ch3 of Row 4
[Ch4, 13dcs, 12ch1 spcs]
Row 6:
Ch3, turn, dc into the first ch1 spc
<Note: Turn the work 90 degrees clock-wise (90cw) - you will be working into the dc you just created>
<Lefty’s Note: Turn the work 90 degrees counter clock-wise (90ccw) - you will be working into the dc you just created>
*Ch3, 6dc into the dc bar you just created
<Note: This forms a petal, when done, back to crocheting into the previous row>
Skp a ch1 spc, slst into the next ch1 spc**
Repeat from * to ** 4 more times
<Note: You are crocheting into the odd numbered ch1 spaces created in the previous row e.g. #1 ch1 spc, #3, #5, #7, etc. skipping over the ones in between>
Ch7, slst to the top of ch3 of row 2
<Note: the Ch7 is the start of the semi circle/ring for the next motif>
[5 Ch3, 5dc, 5petals of (ch3, 6dc), ch7, slst]

Lotus Flower Lace Scarf by Amanda Watson Size 3.75mm hook
Motif #3:
Row 7:
Ch3, turn, 13dcs in ch7 space, slst to the top of ch3 of the last petal formed in the previous motif
[Ch3, 13dcs, slst]
Row 8:
Ch4, turn, (dc, ch1) in the next dc 12 times, dc in the top of ch3 of Row 4, slst to the top of ch3 of the 4th petal formed in 2motifs prior to the current one (e.g. if you are making motif #3, then you will be slst to the 4th petal of motif #1)
[Ch4, 13dcs, 12ch1 spcs, slst]
Row 9:
Ch3, turn, dc into the first ch1 spc
<Note: Turn the work 90 degrees clock-wise (90cw) - you will be working into the dc you just created>
<Lefty’s Note: Turn the work 90 degrees counter clock-wise (90ccw) - you will be working into the dc you just created>
*Ch3, 6dc into the dc bar you just created
<Note: This forms a petal, when done, back to crocheting into the previous row>
Skp a ch1 spc, slst into the next ch1 spc**
Repeat from * to ** 4 more times
<Note: You are crocheting into the odd numbered ch1 spaces created in the previous row e.g. #1 ch1 spc, #3, #5, #7, etc. skipping over the ones in between>
Ch7, slst to the top of ch3 of Row 8
<Note: the Ch7 is the start of the semi circle/ring for the next motif>
[5 Ch3, 5dc, 5petals of (ch3, 6dc), ch7, slst]
Repeat Motif #3 until desired length
<Note: You will work one last motif>
Ending Options:
From speaking with Amanda, the original publication doesn’t tell you how to finish the work, so with minor creative insert, here are 2 different options.
Option 1: Ending with a ch5 instead of ch7 space before the ending motif
Ending Motif:
Row 1:
Ch3, turn, 11dcs in ch5 space, slst to the top of ch3 of the last petal formed in the previous motif
[Ch3, 11dcs, slst]
Row 2:
Ch4, turn, (dc, ch1) in the next dc 10 times, dc in the top of ch3 of Row 4, slst to the top of ch3 of the 4th petal formed in 2 m motifs prior to the current one (e.g. if you are making motif #3, then you will be slst to the 4th petal of motif #1)
[Ch4, 11dcs, 10ch1 spcs, slst]
Row 3:
Ch3, turn, dc into the first ch1 spc
*Ch3, 6dc into the dc bar you just created
Skp a ch1 spc, slst into the next ch1 spc**
Repeat from * to ** 4 more times
Slst to the top of beginning ch3 of Row 2
Fasten Off
[Ch3, dc, 5 petals, of (ch3, 6dc), slst]
Option 2: Ending flower before Ending Motif as you have carried on for the entire scarf (ch7 space)
Row 1:
Ch3, turn, 13dcs in ch7 space, slst to the top of ch3 of the last petal formed in the previous motif
[Ch3, 13dcs, slst]
Row 2:
Ch4, turn, (dc, ch1) in the next dc 12 times, dc in the top of ch3 of Row 4, slst to the top of ch3 of the 4th petal formed in 2motifs prior to the current one (e.g. if you are making motif #3, then you will be slst to the 4th petal of motif #1)
[Ch4, 13dcs, 12ch1 spcs, slst]
Row 3:
Ch3, turn, dc into the first ch1 spc
<Note: Turn the work 90 degrees clock-wise (90cw) - you will be working into the dc you just created>
<Lefty’s Note: Turn the work 90 degrees counter clock-wise (90ccw) - you will be working into the dc you just created>
*Ch3, 6dc into the dc bar you just created
<Note: This forms a petal, when done, back to crocheting into the previous row>
Skp a ch1 spc, slst into the next ch1 spc**
Repeat from * to ** 5 more times
<Note: You are crocheting into the odd numbered ch1 spaces created in the previous row e.g. #1 ch1 spc, #3, #5, #7, etc. skipping over the ones in between>
Slst to the top of beginning ch3 in Row 8
[5 Ch3, 5dc, 6petals of (ch3, 6dc), slst]
Video Tutorial:
Right Handed
Lefty’s Corner ♥
Connect with me here: ♥ 


 ♥ Stay tuned and SHARE!

Ravel This!
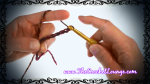
1st Motif up to Row 3 Photo Tutorial
-
-
01) Motif 1 - Starting Chain
Ch7
-

-
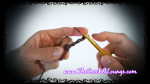
02) Motif 1
slst join to 7th ch from hook
-
-
03) Row 1 Start
Ch3
-

-
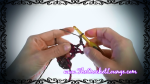
04) 13dc into starting circle
-

-
05) Row 2:
Ch4
-
-
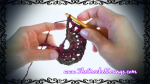
06) Row 2 second stitch placement on top of second stitch of previous row
-
-
07) End of Row 2 Count
Ch4, 12 ch1 spcs, 13 dcs
-

-
08) Motif 1 Row 3 Start
Ch3
-

-
09) Motif 1 Row 3 Second Stitch Placement
dc into ch1 spc
-

-
10) Motif 1 Row 3 Petal
Turn work 90 Degrees Clockwise
-
-
11) Motif 1 Row 3
First Petal Completed
(Ch3, dc in next ch1 spc, turn work 90CW, 6dc into dc bar just created)
-

-
12) Working into Row 2
Skip next ch1 spc, slst into next ch1 spc